
The checklist is a template the inspector uses to conduct an inspection. This article walks you through the steps to edit a checklist. Video tutorials are available at the end of this article.
Instructions
1. Go to: Setup > Checklist Setup Process on the top menu bar.
2. Select the checklist you want to edit by clicking the circle at the beginning of the row.
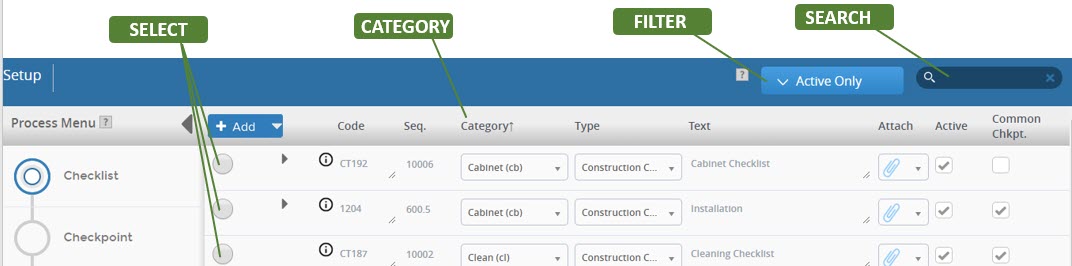
- Checklists are alphabetized by Category. You can reverse sort by clicking the “Category” column header.
- You can also use the "Search Field" in the upper right hand corner to narrow your selection. Or use the drop-down "Filter" to view "All," "Active Only" or "Inactive Only."
- New! The filter defaults to "Active Only."
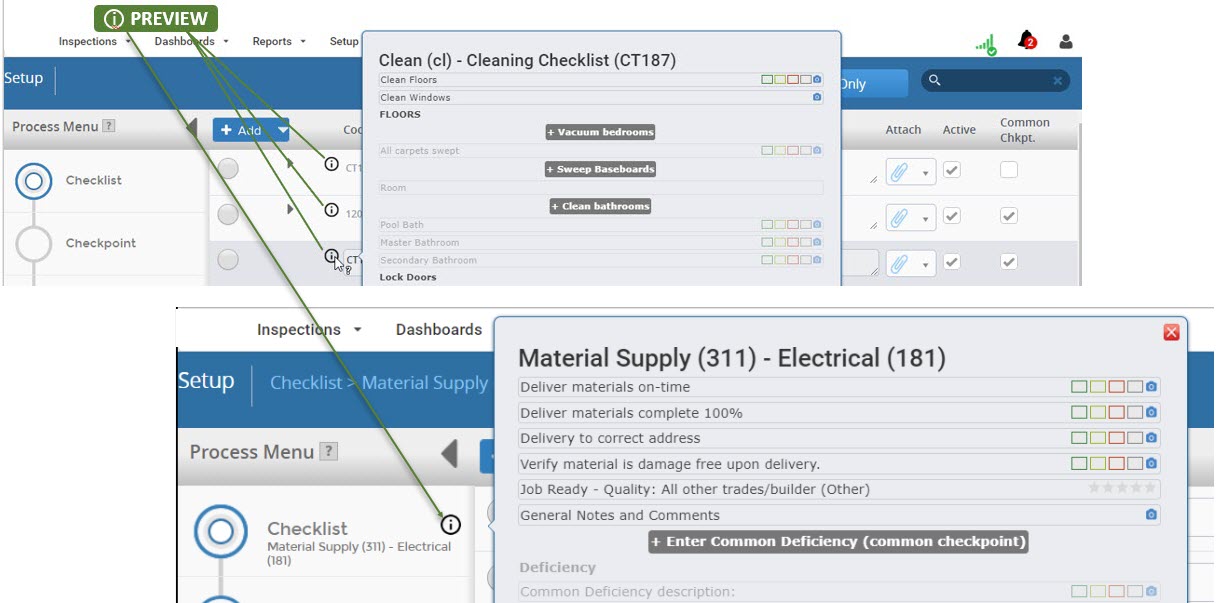
- You can "Preview" the Checklist by clicking the circle i icon to the left of the Category column. Or, after you've selected a checklist, you can click the circle i icon in the left-hand process menu. Tip: If the checklist has more than 25 checkpoints, click the "Show all" at the bottom of the checklist. The popup will disappear. Hover over the preview icon again and all checkpoints will display.
EDIT THE FOLLOWING AS NEEDED
3. Category: Select the “Category” by using the drop-down menu. Type keywords into the drop-down menu to help find the category faster!
- Category is used to organize checklists. The Category name will be shown along with the checklist name on your Inspection Entry screen and reports.
- Is there a Category missing? You can add Categories under "Customization." Go to SETUP>Customization and select "Common Checklist Items." For more information go to: "Category"
5. Text: Edit the Checklist Title in the "Text" box.
6. Attach: To add an "Attachment," click the paperclip to open the drop-down list. You can select "File," "Link," or "Note," depending on what you want to attach.
- "File" will allow you to upload a document from your computer. (Attachment downloads are limited to 100 mb or less.)
- "Link" will allow you to post a URL to a webpage.
- "Note" will allow open a dialog box where you can type a message.
Open Checklist Attachments: Checklists with Attachments have a toggle icon on the left-hand side of the checklist row. Click the icon to toggle it down and you'll see the attachments.
Delete Checklist Attachments: Delete the attachment by clicking the light gray trashcan icon to the far right of the attachment.

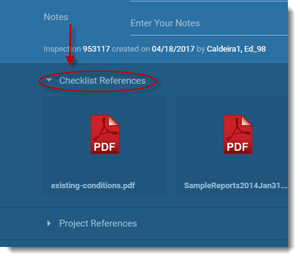
Checklist References: Attachments you add to checklists are displayed as "Checklist References" on the Inspection entry screen. They will be located at the bottom of the blue header area. Use the click the toggle icon to the downward position to view and open the attachments.
7. Active: Check or uncheck the "Active" box to make the checklist active or inactive. Inactive checklists will not be available for selection during the Inspection selection process or the Project setup process.
8. Delete: To delete this checklist, click the red "trashcan icon."
- The software does not allow you to delete any checklist that has been used for an inspection. There will be no trashcan icon available to click if the checklist cannot be deleted.
9. Save: Click "Save" to save your changes.
Advanced Setup Options
The following Setup Options are available under the "Advanced View." Not all users can view or access these options. Please contact Customer Support for assistance. Click on the action title for more information.
Video Tutorials:
Create a Checklist - Part 1 (3:50)
Create a Checklist - Part 2 (8:21)
Comments
0 comments
Please sign in to leave a comment.