
This article is a continuation of Add a New Checklist and Edit a Checklist.
Instructions
1. Select the Checklist by clicking the circle at the beginning of the row.
- Checklists are alphabetized by Description. You can reverse sort by clicking the "Description" column header. Scroll down the page to find the Checklist.
- Use the "Search" field in the upper right hand corner to narrow your choices.
- Use the "Filter" drop-down to display "All," "Active Only," or "Inactive Only."
2. Select "Projects" from the Process Menu to display a list of inspectors.
3. To make the checklist available in all projects, click the box in the "Selected" column.
- A checkmark in the box means that every project and phase has been selected.
- A circle in the box means that some projects and/or phases are selected, but not all.

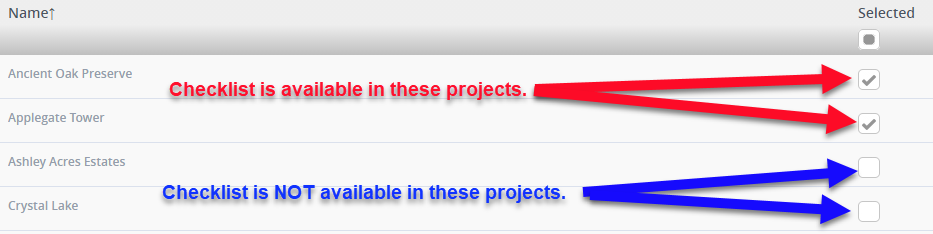
4. To make the checklist available in specific projects but not available in others, click the boxes associated with the project in the "Selected" column.
- A checkmark in the box means the checklist is available in that project.
- An empty box (no checkmark) means the checklist is not available in that project.
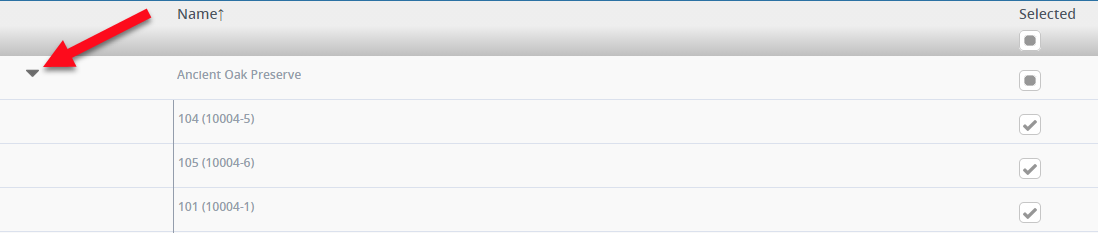
5. To make the checklist available in specific phases for a project but not available in others, click the carat in front of the project name. This will open a list of phases, then check the boxes associated with the phase where the checklist should be available.
6. Click "Save" to save your changes.
Comments
0 comments
Please sign in to leave a comment.