
Instructions
1. Click the "Go To Advanced View" button on the Process Menu.
2. Select the Project by clicking the circle at the beginning of the row.
- Projects are alphabetized by Description. You can reverse sort by clicking the "Description" column header. Scroll down the page to find the Project.
- Use the "Search" field in the upper right hand corner to narrow your choices.
- Use the "Filter" drop-down to display "All," "Active Only," or "Inactive Only."
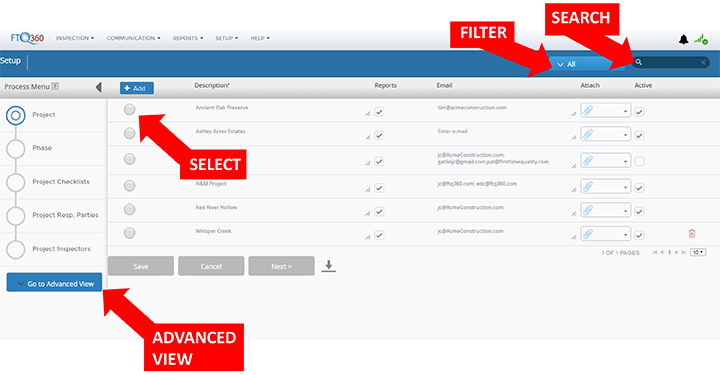
The Advanced View will expand the column headers to provide additional Setup Features.

3. Code - The system will generate a code or unique identifier for the Project. Click into the field to enter your own code from accounting records, or use the default code.
4. Sequence - This field is used to put the Projects in order when performing an inspection. The default order is from smallest to largest. You can use decimal points, if necessary, to get the exact order you want.
- For example, if you’d like a task in between #3 and #4, you can give it the sequence number “3.5."
5. Description - Type the project name in this field.
- If you are adding Equipment, this is a required field. You can press save now and the Equipment will be associated with the Project/Community. All other fields are optional.
6. Division - You can assign this project to a specific Division, if your company uses divisions. If text is entered, the inspector will select the appropriate Division, then Project when starting an inspection. Leave this field blank if divisions aren't used.
7. Reports - Select the Reports checkbox to have Project/Community reports sent to the email addresses associated with the project.
8. Email - Enter the Email Addresses that will receive reports for this project/community. Separate multiple addresses with a semicolon ( ; ).
9. Information - This is a generic text box to enter project information that will appear on the inspection pdf and some reports.
10. Private Notes: A Private Notes field lets administrators add notes that do not appear on inspection reports.
11. Attach: To add an "Attachment," click the paperclip to open the drop-down list. You can select "File," "Link," or "Note," depending on what you want to attach.
- "File" will allow you to upload a document from your computer. (Attachments are limited to a maximum of 250 mb.)
- "Link" will allow you to post a URL to a webpage.
- "Note" will allow open a dialog box where you can type a message.
Open Project Attachments: Projects with attachments have a toggle icon on the left-hand side of the project row. Click the icon to toggle it down and you'll see the attachments.
Delete Project Attachments: Delete the attachment by clicking the light gray trashcan icon to the far right of the attachment.

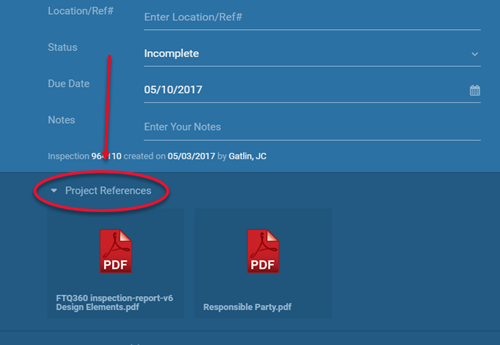
Project References: Attachments you add to projects are displayed as "Project References" on the Inspection entry screen. They will be located at the bottom of the blue header area. Click the toggle icon to the downward position to view and open the attachments.
12. Active - The Equipment will automatically be checked as active. If you don't want to make it active yet, click the checkbox to remove the checkmark.
13. Delete - You can delete this Equipment by clicking the red "trashcan icon."
- If there is no trashcan icon available, the Equipment cannot be deleted.
14. Save Button - Click "Save" to associate the Equipment to the Project/Community.
Comments
0 comments
Please sign in to leave a comment.