
Locations can be added to a project and can apply to the complete project or be restricted to a single phase. Locations give you another level of refinement when inspecting or locating deficiencies. Uses include setting up a high-rise project with apartment unit locations.
NOTE: Accounts integrated with Procore will not be able to add Phases or Locations in FTQ360. They must be added in Procore and then synced to FTQ360. Once the item is in FTQ360, it can be selected in the Setup pages.
Instructions
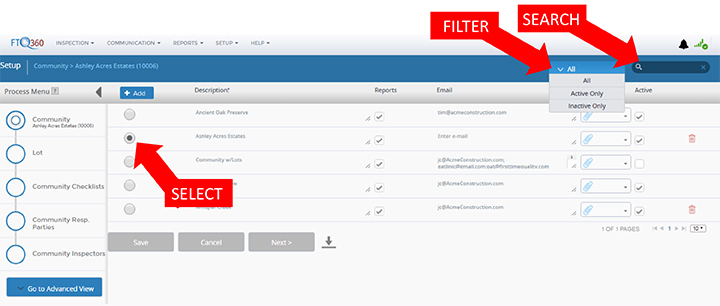
1. Go to SETUP > Project Setup Process
2. Select the "Go To Advanced View" button on the left-hand Process Menu.
3. Find the Project you want to edit.
- Projects are alphabetized by Description. You can reverse the sort by clicking the “Description” column header.
- You can also use the search field in the upper right hand corner or the drop-down "Filter" to the left. The drop-down allows you to view "All," "Active Only," or "Inactive Only."
- To select, click on the radial circle at the beginning of the row.
4. Select “All Locations” in the left-hand Process Menu.
5. Click the “+Add” button to create a new line.
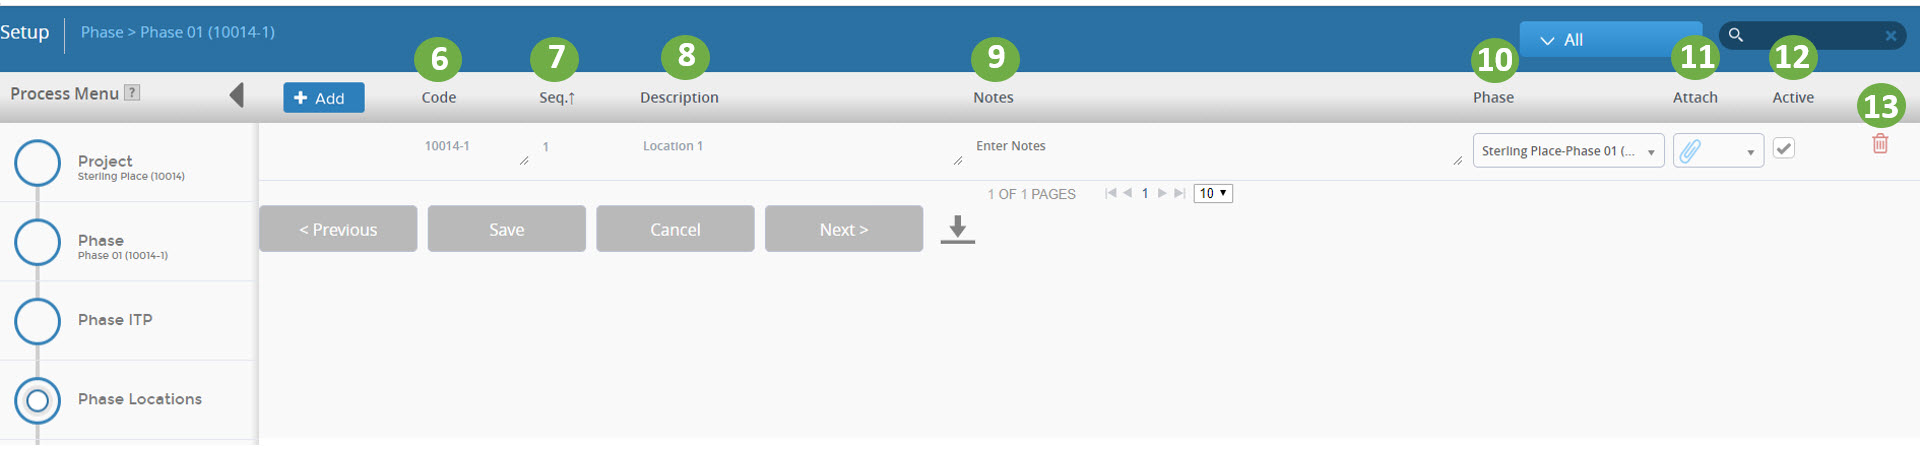
6. Code: Enter the "Location Code" or leave as is. You can input your own code from accounting records, or use the default code generated by the system.
7. Seq.: Is the abbreviation for "Sequence." You can put the list of Locations in order on the Inspection Entry screen. The order is from smallest to largest. You can use decimal points, if necessary, to get the exact order you want.
- For example, if you’d like an item between #3 and #4, you can give it the sequence number “3.5."
If you want the sequence to be alphabetized by the Location Description, make the sequence numbers all the same number.
8. Description: Type the name of the Location in the “Description" field.
- If you are adding a Location, this is a required field. You can press save now and the Location will be associated with the Project. All other fields are optional.
9. Notes: This is an optional field where you can type additional comments.
10. Attach: Click the paper clip icon to add a file, link, or note to the location.
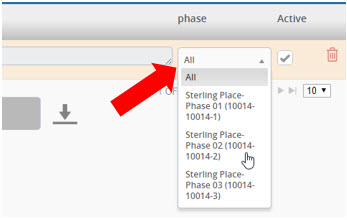
11. Phase: If the Location is Phase-specific, select the appropriate phase from the drop down menu.
12. Active: The Location will automatically be checked as "Active." If you don't want to make it active yet, click the checkbox to remove the checkmark.
13. Delete: You can delete the Location by clicking the red "trashcan icon."
- If there is no trashcan icon available, the Location cannot be deleted because it has been used in an inspection. Deleting the inspection(s) will restore the trashcan icon.
14. Save: The Save button is at the bottom of the screen.
Comments
0 comments
Please sign in to leave a comment.